Monday, May 26, 2025

Tues May 27

Use your time to EDIT, ORGANIZE, and even begin uploading photos into the Canva program for your final slideshow. 

Creative Photo Ideas for Final Slideshow: check out some of these links for creative ideas or do a search for interesting ideas on Getty images or istock photo.

Check out photographing food colour and milk:
Creative Abstract Food Colouring & Milk
Tips on how to shoot your pet: Pet Photography
Candlelight Photography: Taking Candlelight Photos
Flower Photography and a good review of Composition: 
Flower Photography
More tips on shooting Flowers
Still Life Photography: Still Life Photography
Video on a photographer's passion : Photographing Bubbles
Black and White linen how to get better shots:
Video on shooting in Black and White

The following are links to some 2 minute videos showing you what creative photographers are up to.

Flickr Moments: Teen Photographer uses mirror to create an Illusion


Thursday, May 22, 2025

Thurs May 22

FINAL SLIDESHOW PRESENTATION : TUES JUNE 17 in class no exceptions!!!!!

 Ideas for Creative Shots and shots for your slideshow.

  • glass ball reflection shots
  • mirror reflection shots
  • bubble shots
  • cd reflection shots
  • light photography (see me for details and how to's)
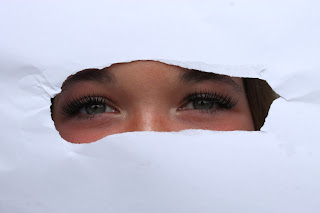
  • ripped paper shot
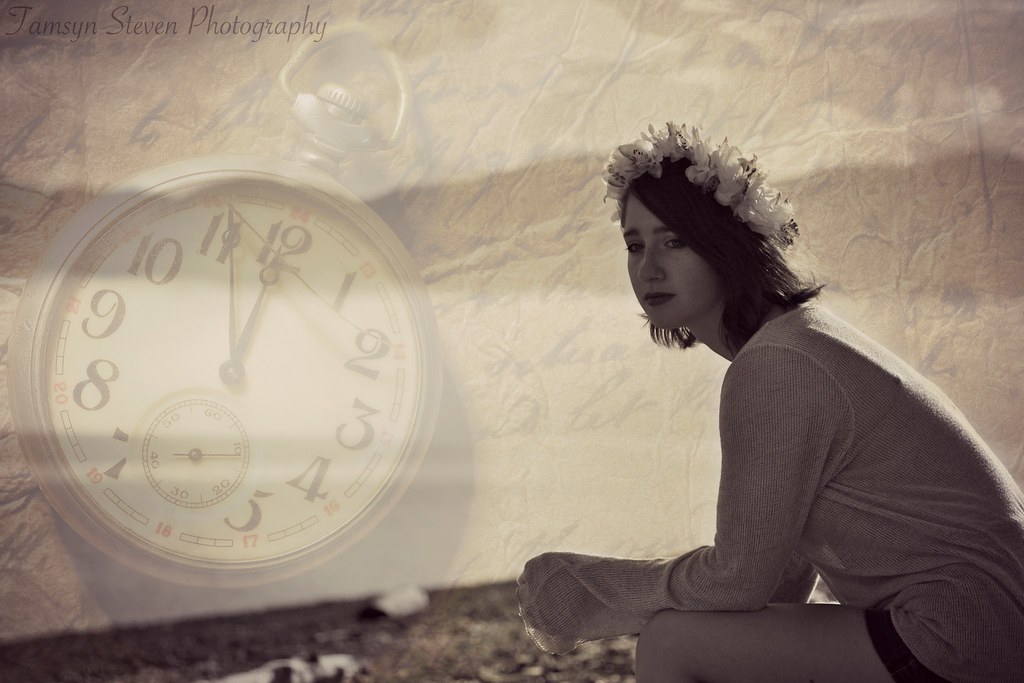
  • overlay

  • creative photo#5

    creative photo#6

 Photo by Avery Suave
Photo by Issy Ratcliff


Tuesday, April 29, 2025

Thurs May 1

 Term 4 Work

  • Step down: 5 shots (10 marks)
  • Spring/cherry blosom shots: 10 shots (10 marks)
  • Overlay: minimum 1 shot you have taken combined into photoshop, you need to use some of the tools to change the look of the photo or change the opacity of the photo.should be artistic (10 marks)
  • Portraits: 10 shots edited of one person in a slideshow/video, set to music (30 marks) Use Canva. TO BE SHOWN IN CLASS THURS MAY 15. If the video is not ready to be shown on this day, you will lose 10 marks for not presenting on time. Once your photos are uploaded to Canva, you can work on the slideshow/video at home.
  • Creative shots 5 (10 marks)You will have lots of different choices to try different techniques
  • Spot colour: 1 shot (10 marks)
  • Final Slideshow 35 shots, 10 can be from assignment shots, set to music (50 marks)
  • WANTED ad ( use a headshot or take a photo for this assignment, see me for details 10 marks)
FINAL SLIDESHOW PRESENTATION : TUES JUNE 17 in class no exceptions!!!!!
Final Video in Canva: Step by Step Instructions
1. Log in to Canva with your school email
2. Go to video, choose LANDSCAPE
3. On the left hand side choose UPLOAD, this should take you to the computer, upload your portrait images from your folder on the Mdrive
4. Drag and drop them into the slides in the video program
5. You should start with a title page with your name on it. "Ms Chase's Final Video"
6. Clips should be 3.5-4 sec in length and have a dissolve or otherwise simple transition, add a blank black slide at the end so the video does not end abruptly.
7. Add music, you can use music in Canva or upload your own music. You may need to use two songs, or repeat the song.
8. When finished, go to SHARE, Download mp4 video, then go to downloads on the computer, move your file to your folder COPY/PASTE and also into the group folder

Note: If you have vertical photos it might be best to put a coloured background behind the photo, it will look better.

Tues April 29


Tuesday, April 22, 2025

NEW assignment: Portraits

 Portraits 

Working with 1  model of your choice, you should plan to photograph portraits of this individual. You will need 10 different shots of your model  . Plan to shoot a variety of different shots including but not limited to: a couple of head shots, several full body shots, creative shots. Study other portrait photographer's work and learn how to effectively pose your model. This should be part of getting ready for your assignment.

This assignment is worth 30 marks. 20 marks for your portraits posted to Mdrive and 10 marks for your portraits put into a slideshow, set to music for viewing. If you do not meet the deadline for the slideshow, you will receive a zero for the presentation portion of the assignment.

Tips:

  • plan your shots/shoot
  • be aware of where the light is ( best times to shoot dawn and dusk)
  • choose a good background
  • use a prop ( umbrella, hat, scarf, pumpkin etc)
  • shoot people in their element ( skateboarder with a skateboard at the skatepark)
  • create a rapport with your model and direct the shoot, which means tell the model what you want them to do.
  • get out and shoot when the weather is good.
  • make sure you are not too far away from your subject
  • these shots should not all be shot on the same day and MUST be edited.


Tuesday, March 11, 2025

Week of March 10-14

TERM 4
  • Step up/down 5 shots
  • Overlay in Photoshop ( 3 images, one must be your own, please use opacity and/or lighting effects on the right side of Photoshop near opacity in this overlay. Again we are trying to create an artistic photo.
  • NEW:  Signs of Spring: 5 shots plus 5 cherry blossom shots. Get out into the world and shoot the concept of spring. Ask yourself...what are the signs of Spring, try to think outside the box!

 Assignments for TERM 3

Approximately 3 classes until the end of term.

  • Top 5 - 5 shots (5 marks)
  • Headshots - 5 shots (10 marks)
  • Best - 5 shot 5 different ways (5 marks)
  • Snow shots/other - 5 shots (10 marks)
  • Hunt #1 -10 with digital SLR cameras label each shot (20 marks)
  • Head Swap -  1 shot in Photoshop (10 marks)
  • Composition 1 - 10 shots label each shot (20 marks)
  • Multiplicity - 1 shot, edited in Photoshop (20 marks)
  • Candy shots - 10 shots, properly edited for cropping and lighting (20 marks)
  • Candy ad


SAMPLE OVERLAYS
                           Photo by Tamsyn Steven


                                                                                        Photo by Mai Nguyen


                                                                                   photo: l chase


Thursday, March 6, 2025

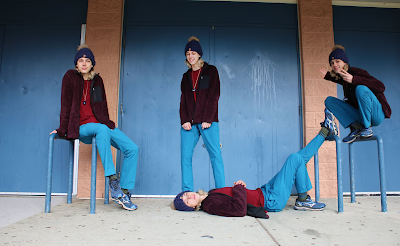
 Multiplicity Shot : 20 Marks

Step by Step Instructions for Doing the Shot ( 4 shots in one)

You should be going out with a partner, a digital slr camera and a tripod. Find a location that has a clean and interesting background. Start by taking some practice shots to make sure you are not too far away from your subject. Have your subject think about doing 4 different poses. Each pose will be a different shot. ALL OF THESE PHOTOS SHOULD BE SHOT ON THE SAME DAY. Come back to the class, and using the card reader upload the photos and save them in your folder and label  Multiplicity.

1. If you need to crop or edit for lighting, do this first to all photos.
2. Photos should be labelled: Background, Photo1,2,3,4.
3. Open Original photo in Photoshop. This is the photo you will be adding the other photos to.
4. Next open Photo 1 in a new tab, use the selection tool ( the fourth tool down on the left) to select around the photo, it does not have to be perfect since you can erase if you have to.
5. Next go to edit/cut and cut out the image you have just selected.
6. Open your original photo and edit/paste it in the the original photo( photo 1). It will not be exactly where you want it...so go to edit/transform/scale, hit apply or the return button. Then using the move tool ( top on left) move the photo where you want it. If scaling it up or down, make sure to hold the shift key when scaling so you resize proportionately. ( I will be marking to make sure your photos are not warped)
7. Continue the same for photo 2 and 3
8. When finished, save a Photoshop version and a jpeg version.